Getting Started
J1From parts to first drive
This guide covers everything from soldering your last header to driving the robot from your phone. Read it once before you start — the whole process takes about fifteen minutes.
The manual is split into short pages:
- Getting Started (this page) — parts checklist and board orientation
- Assembly — connecting the battery, motors and servo, plus charging
- First Drive — joining the robot's WiFi and driving it from a browser
- Customisation — uploading your own control pages and changing settings
- Maintenance — firmware updates and factory reset
- Troubleshooting — common problems and fixes
Parts checklist
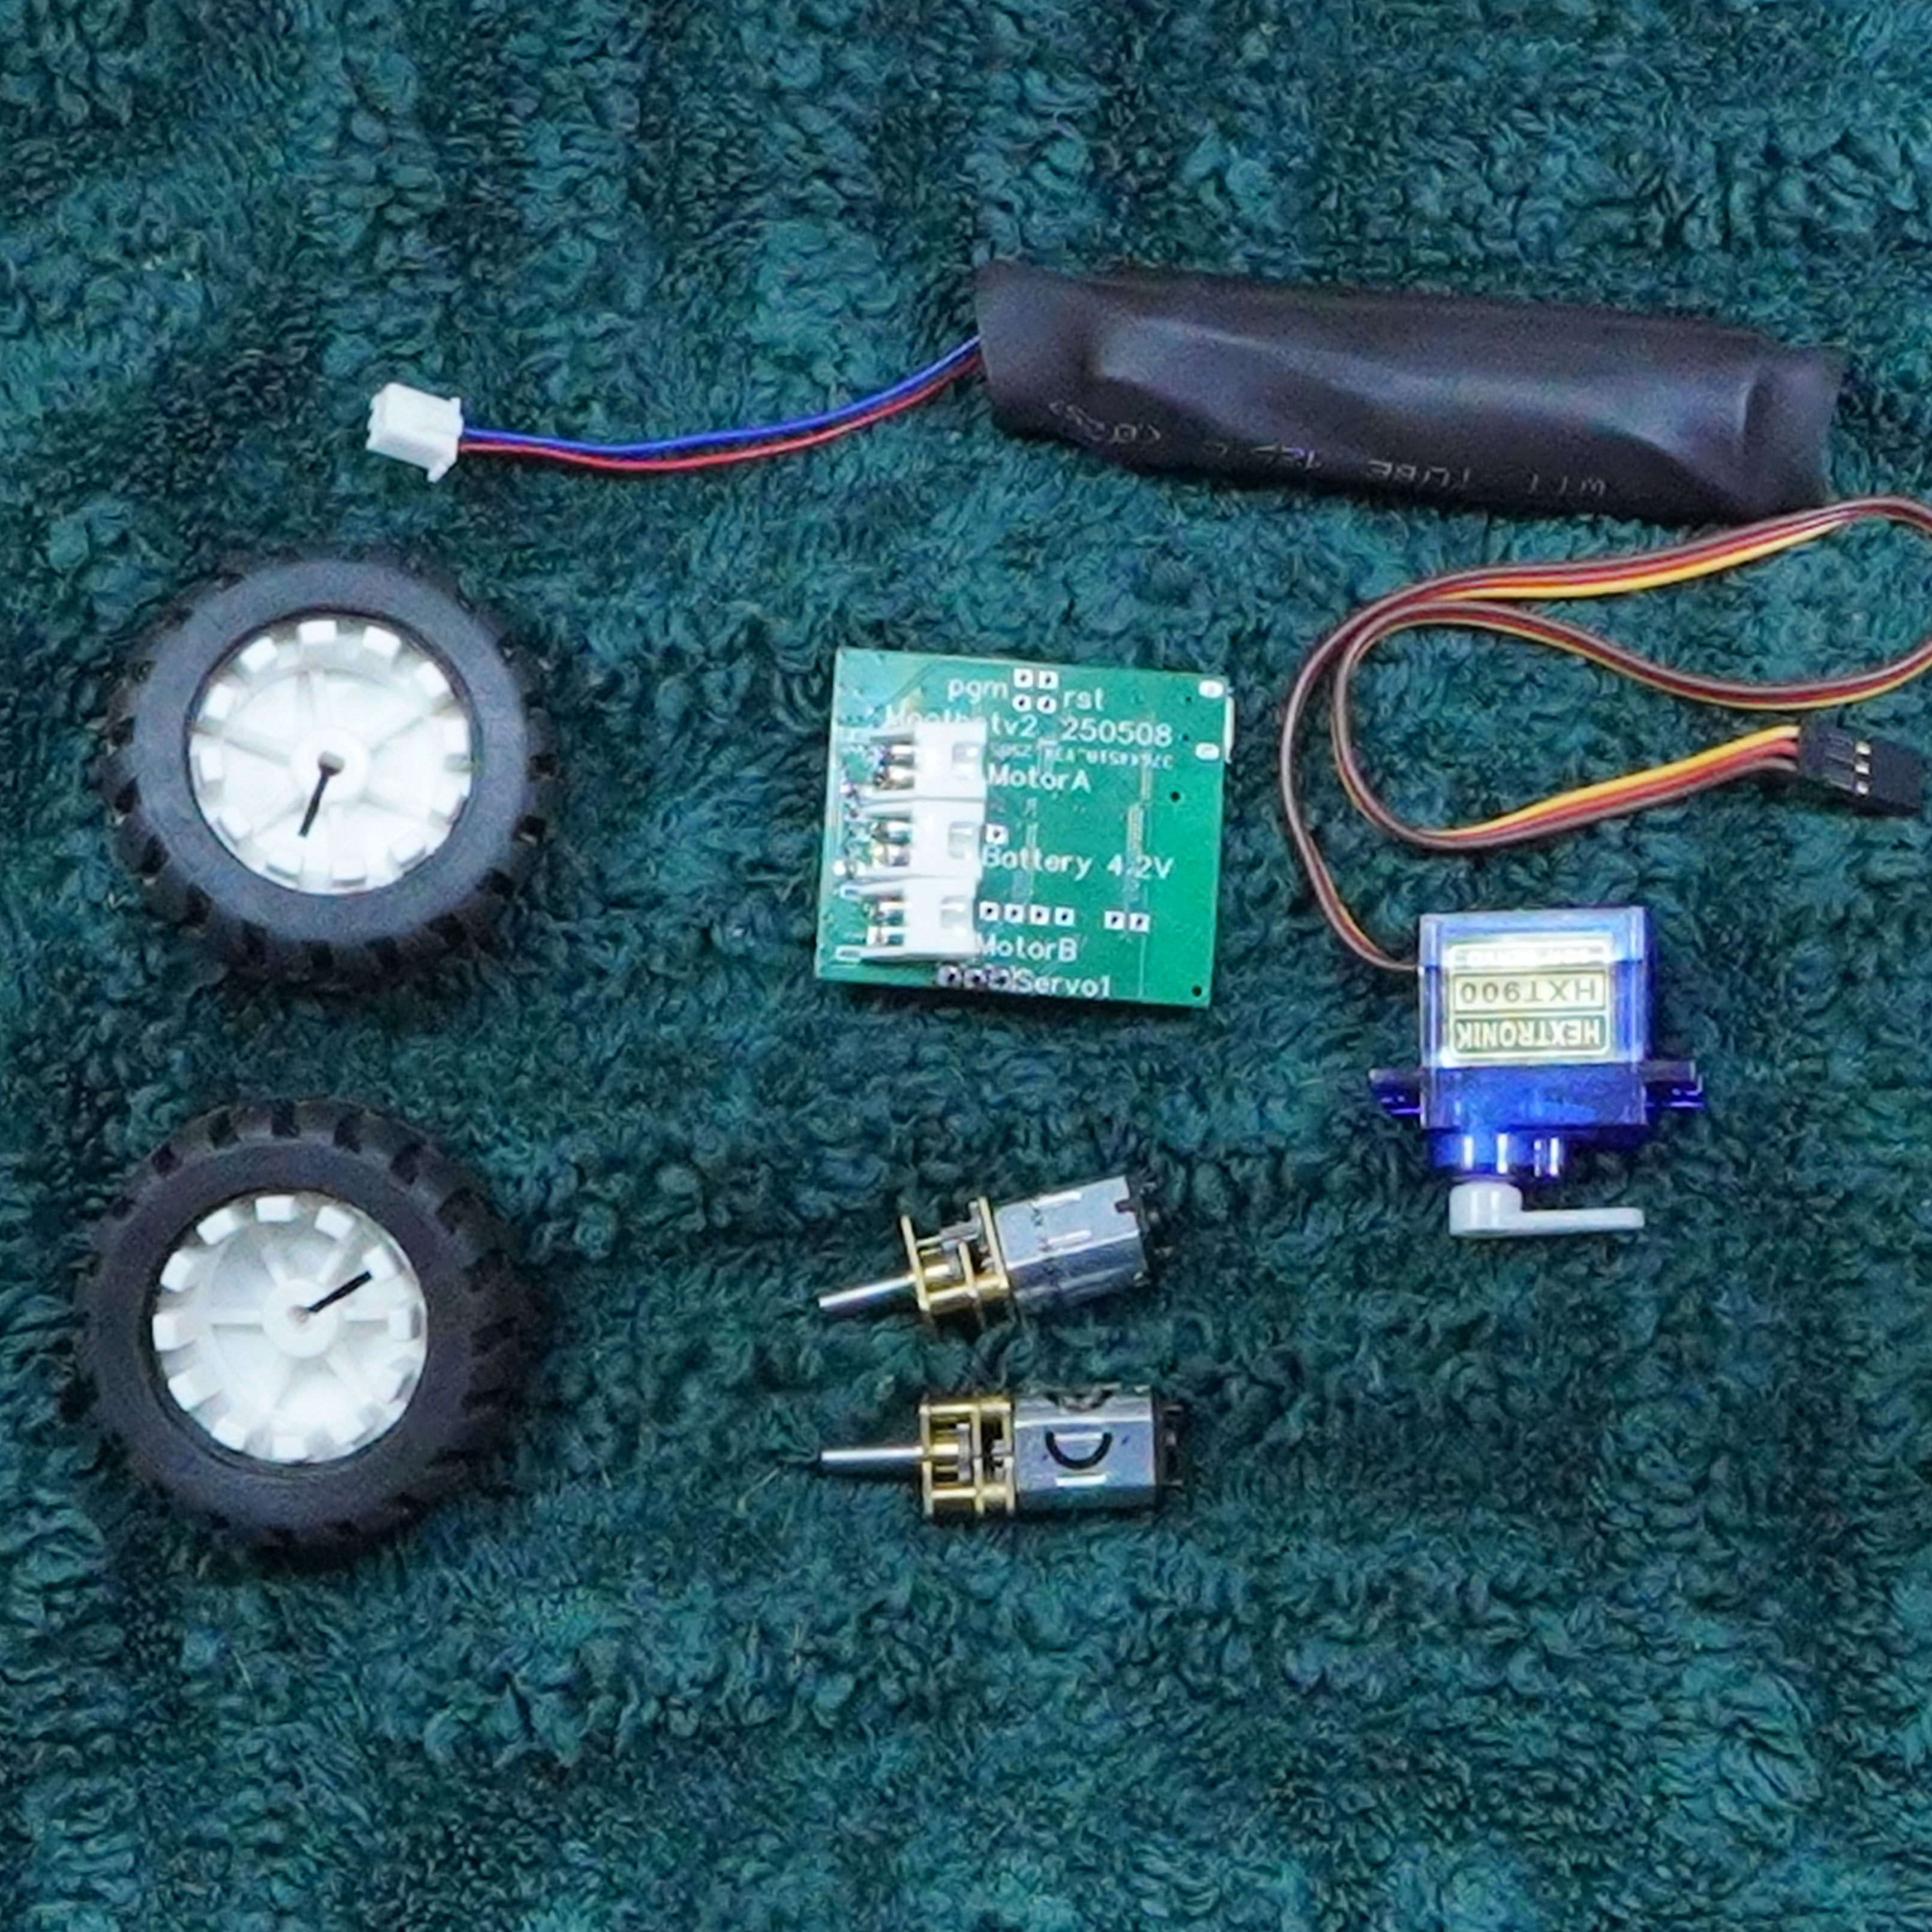
Before you begin, confirm you have all of these:
- Kijani controller PCB
- 1S LiPo battery (3.7 V nominal)
- 2 × DC motors (N20 gear motors recommended)
- 1 × servo
warning
Check that every part is present before you start. Missing a motor or battery connector mid-build is frustrating.
Board orientation
Familiarise yourself with the PCB before connecting anything.
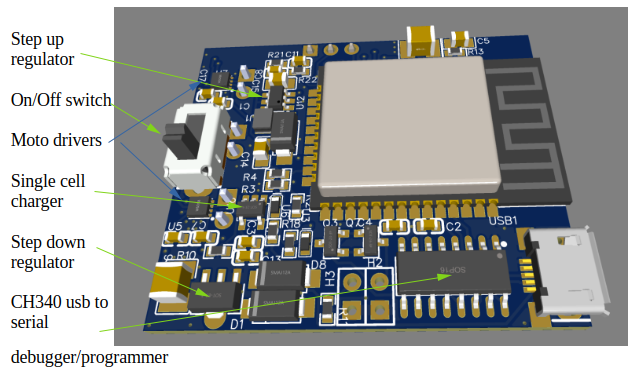
Front
ESP32 module, motor and servo headers, USB port:
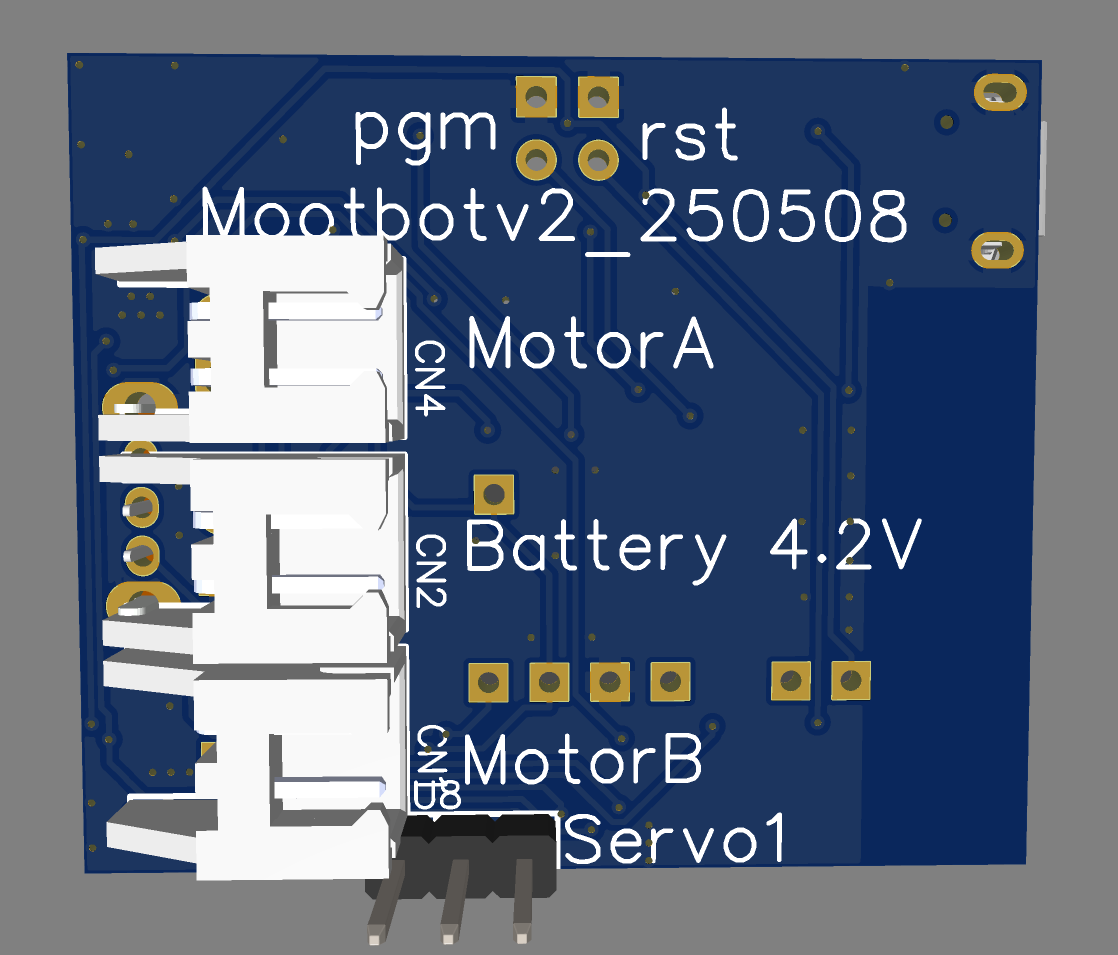
Back
Ground pads and solder jumpers:
Ready? Move on to Assembly.